Coaxing paperwhite bulbs: an aura of spring in the dead of winter by Suzanne

DSCF61111.jpg
DSCF61152.jpg

With very little coaxing paperwhite bulbs will reward you with clusters of fragrant blooms in as little as four weeks. All you need is a container, a holding medium and water.

Soil is not necessary; paperwhites will happily grow anchored in either decorative stone, glass, pebbles or gravel.

DSCF50021.jpg
DSCF5005-22.jpg
DSCF52123.jpg

I started my paperwhite bulbs in mid December, too late for Christmas blooms but perfect timing for flowers in mid to late January.

I chose white pots that belonged to my mother and small river stones for anchoring the bulbs. I decorated the top with moss.

The grande finale is obviously when delicate little white trumpets appear and release their characteristic heady scent. But I get great pleasure out of tracking the paperwhites' growth until they flower. This poem sums it up perfectly.

DSCF58061.jpg
DSCF58342.jpg
DSCF60993.jpg

Next year I'll try something suggested by researchers at Cornell University: to keep paperwhites from growing too tall and spindly, and to prevent droop I'll add a splash of gin (almost any hard liquor will do) to the water. It supposedly shortens the stems, lowers the center of gravity and prevents paperwhites from getting top heavy.

Here are guidelines on how to coax paperwhite bulbs. Best growing time is between October and January.

Place a layer of stones or glass to a depth of about 2 inches in a small vase or about 4 inches in a larger vase.

Place a layer of paperwhite bulbs close to each other, roots facing down.

Put a few stones or pebbles around and between the bulbs to anchor them. Leave the tops of the bulbs exposed.

Add water to just below the base of the bulbs. If the base sits in water, it will rot. If you are using a pottery vase, use your finger to measure the water level. Replenish when water level falls.

Put in a cool and dimly lit or dark place for one to two weeks or until roots have begun to take hold and green shoots emerge. Then move the pot to a bright spot.

Rotate the pot regularly to encourage even growth.

Four to six weeks later paperwhites should bloom, longer if in a room with less light.

After your paperwhites have finished blooming, gently pull the plants from the holding medium and toss them in the compost as they won't flower again.

Wash and dry the stones and the container for future use.

DSCF6156a.jpg

Oven roasted pecans with maple syrup by Suzanne

DSCF5102.jpg

I bought raw grocery store pecans recently. Guests were arriving and I wanted something to nibble on with our wine. Once home, I discovered the pecans were ho hum in texture and taste; they were a chore to chew and rather bland.

Turning on the oven and roasting them transformed tasteless raw pecans into something remarkable, sophisticated and complex. They became delightfully crisp and turned a beautiful darker shade. Roasting deepened the flavour too. I even heard them crackle as they roasted. Roasting pecans also makes your home smell wonderfully fragrant!

If you serve them to guests before they completely cool, roasted nuts become a tactile pleasure. "Hmmm, these nuts are still warm," one guest murmured.

DSCF5083b.jpg
DSCF5062b.jpg
DSCF5097c.jpg

Roast nuts plain or flavour them how you prefer. I gave mine a good splash of maple syrup along with sea salt and lots of pepper.

The thing to keep in mind when roasting nuts is they go from not done to ready in a nano second! To ensure even roasting, check in on them from time to time and move them around. The nuts at the edges of the baking pan can brown sooner than the nuts in the middle.

These are great as a companion to drinks before dinner or as a snack. A small jar would be a great gift to bring the host of a party. They also taste great in a salad.

Oven Roasted Pecans with Maple Syrup

Preheat oven to 350 degrees F or 325 degrees F if your oven runs hot.

Place pecans in a bowl. Drizzle with maple syrup, add salt and pepper to taste.

Toss well.

Spread pecans in single layer on rimmed baking sheet lined with parchment.

Place in oven.

Check after 5 minutes, stir or redistribute the nuts and continue roasting.

Check the nuts again after 3 to 5 minutes.

Return to the oven if needed and check again after another 3 minutes.

You know they're done when there is a nutty smell in the air and the nuts are slightly darker.

Nuts rarely take longer than 15 minutes to roast, usually closer to 8 to 12 minutes.

DSCF5104x.jpg

Inspiration found; an ornament exchange party by Suzanne

DSCF4849.jpg

One snowy evening last week I bundled up and headed a few blocks away for an ornament exchange party at Cindy's.

Every year in early December for the last ten years Cindy's been welcoming about 20 neighbourhood moms into her home. I wrote about it here and here.

Having a camera makes you pay close attention to elements that make any gathering a pleasure to attend - good lighting, good company, delicious food and drinks, and a host enjoying herself.

IMG_8994a.jpg
IMG_8992b.jpg
DSCF4907c.jpg
DSCF4956d.jpg

Welcomed, warm and cozy inside. Fire, lots of greenery, ornaments, candles and lights.

DSCF4927a.jpg
DSCF4882b.jpg
DSCF4864c.jpg
DSCF4897d.jpg

Offerings of wine, fizzy water, and a special drink - cranberry juice and champagne plus naughty drink markers.

DSCF4926a.jpg
DSCF4874b.jpg
DSCF4914c.jpg
DSCF4856d.jpg

Savoury eats are served from the beautiful walnut topped island in the kitchen - pickled this and that, canapés, delicious cheeses, fresh figs, grapes, nuts, crackers and an inspired vegetable tray.

DSCF4964a.jpg
DSCF4973b.jpg
DSCF4946c.jpg

Desserts are served in the dining room. Some are snuck away in napkins for children's lunches the next day. Cindy doesn't mind.

DSCF4940a.jpg
DSCF4936b.jpg

We end the evening with the ornament exchange. It's an opportunity to give and receive with added elements of randomness and surprise - the drawing of the numbers from Cindy's hat and then deciding which wrapped ornament to choose from under the tree, not knowing what's inside.

IMG_8792a.jpg
IMG_8793b.jpg
IMG_8813-1c.jpg
IMG_8804d.jpg

This and that by Suzanne

Here are five things that caught my attention lately:

1. this juice

DSCF4382.jpg

because it's an elixir when I'm feeling less than vital - 3 carrots, 1 orange, 1 thumb-sized piece of ginger.

2. these candles

DSCF4605.jpg

because I love the smell of bees wax and how it burns.

3. these wee poinsettias

DSCF4617.jpg

because they're precious and I've no space for bigger versions.

4. this food waste bag

DSCF3693.jpg

because it's perfect for storing egg shells for the garden.

5. these shingles

IMG_8518.jpg

Air drying chamomile, mint and sage by Suzanne

DSCF3716.jpg

November arrived and I'm giving myself a pat on the back for getting the garden to bed before things freeze up.

Potted hostas are in the garage covered with a blanket. Pots of mint and catnip are safe in the ground until I retrieve them in the spring.

I hate to waste so I gathered the last of the chamomile, mint and sage, and I'm air drying them.

Air drying takes longer than using an oven or dehydrator, but it's an easier method for preserving fresh herbs. Plus air drying means the oils in the leaves (wherein the flavour lies) aren't depleted and you get more pungent herbs.

DSC_40261.jpg
DSC_53662.jpg

Any herbs still growing in your garden? Harvest them now and air dry them before it's too late.

Here are some guidelines:

  • Remove only the healthiest blossoms and branches.

  • Lay chamomile flowers in a single layer on a flat surface and store in a container once thoroughly dry.

DSCF3718a.jpg
DSC_6361b.jpg
DSCF3725c.jpg
DSCF3746d.jpg

Cut mint and sage branches, give them a good shake and remove any discoloured or damaged leaves. Rinse in cool water and pat dry with a clean towel.

  • You can strip the leaves from the stalk and allow them to dry individually, laid flat on a clean towel.

  • Or, bundle four to six branches together, securely tie, and hang in an area free of dust, moisture and direct sunlight, with plenty of air circulation.

  • Hang undisturbed for 1 to 3 weeks. Bundles shrink as they dry so check every so often to ensure branches are secure and not slipping.

DSC_4678.jpg
DSC_4705b.jpg
DSC_4824-2c.jpg

You can also place bundles inside brown paper bags and hang to dry if dust poses a problem. Make sure to punch a few holes in the bag for good air circulation.

  • When leaves crumble between your fingers your herbs are ready to be taken down and stripped from the branch.

  • If using the bag method vigorously shake the bag and a give it a few squeezes. The bag is great as it catches all the dried leaves.

  • Store herbs in a tightly lidded container.

DSCF3717A.jpg

Beat the winter blues; visit a greenhouse by Suzanne

IMG_8221.jpg

A greenhouse, I recently experienced, is both a physical and psychological oasis in the dead of winter.

Plants are proven mood enhancers and the heritage greenhouse here in Ottawa houses more than 500 lush tropical varieties.

The building itself is a sight to behold. It's a soaring web-like structure made almost entirely of glass and metal, a seemingly too thin separation from the realities of a harsh winter day. Yet inside you're guaranteed the air is warm and humid. You can ditch your winter duds, close your eyes and be momentarily transported to somewhere tropical.

Here's hoping there's a greenhouse somewhere near you.

IMG_8276a.jpg
IMG_8304b.jpg
IMG_8233c.jpg
IMG_8294d.jpg
IMG_8263e.jpg
IMG_8306f.jpg
IMG_8265g.jpg
IMG_8291i.jpg
IMG_8287j.jpg

Marigold, the perfect fall flower by Suzanne

DSC_6138.jpg

Marigolds are the perfect fall flower for colour palette alone but also because they thrive in spite of chilly temperatures and shorter daylight hours.

It’s October and while most of the garden is shades of solid greens, the marigolds are multi-shades of vibrant yellows, reds and oranges in stunning single and bi-colour patterns. Where I live marigolds start blooming in late June or early July and by the fall are really feeling themselves.

Before the first hard frost hits I'm cutting marigolds for vases and bringing inside potted marigolds so I can enjoy them for longer.

DSC_6224a.jpg
DSC_6039b.jpg
DSC_5803c.jpg
DSC_6332d.jpg
DSC_6218f.jpg
DSC_6270g.jpg

My very first plantings of marigolds were store bought but now I only plant from harvested seeds.

It was never my intention to harvest marigold seeds. It's the blooms, at the height of their beauty, I can't resist and I collect them by the basket full. The more I pluck, the more marigold blossoms are produced. Magic!

Inside the house I watch them dry and change colours - to mustard yellows, burnt oranges and burgundies. Then I discover seeds inside the pod, at the base of the blossom.

Now I save the seeds. Saving seeds for planting reminds me how great nature is. It's a comforting micro ritual - harvesting, sowing, planting, and enjoying marigold blooms.

DSC_30153.jpg

I had read somewhere that you only get viable seeds if you let the blooms ripen and wilt on the plant before you harvest. I had no idea. I was plucking blooms long before they died.

However, experience tells me you can harvest early as long as you allow the flowers to dry and leave the seeds undisturbed to ripen in the pod. I've had very good luck growing marigolds from seeds harvested this way. Still, I always assume not every seed will grow and I plant them extra thick. Lord knows I have plenty!

DSC_6071.jpg
DSC_27272.jpg
DSC_38393.jpg

One final note: marigolds are not only the perfect fall flower but wonderful companion plants for your garden. They balance the garden's ecosystem by repelling harmful insect pests like aphids and white flies. Even their roots are at work underground releasing into the soil thiopene, a chemical that repels harmful nematodes.

DSC_6125a.jpg
DSCF3582b.jpg

This and that by Suzanne

Hello readers. If you haven't already discovered it yourself, I added a new page to my blog titled "Inspiration." It's a list of links leading you to blogs I love. Who knows, maybe you'll find inspiration there, too.

Here are five things that caught my attention lately:

1. these hazelnuts

DSC_5541-685x1024.jpg

because they taste so fresh and good and a thoughtful friend recently gifted me two packages (from Italy.) I'm already on the second bag.

2. these crab apples

DSC_5477-685x1024.jpg

because another thoughtful friend invited me to pick them from her glorious backyard tree.

3. this crabapple jelly

DSC_5550-685x1024.jpg

because I love food gifts (see items 1 and 2) and I will never get around to making my own. What about that colour!

4. this palo santo wood

DSC_5526-685x1024.jpg

because this old house can smell musty sometimes and nothing refreshes it better, faster.

5. these marigolds

DSC_5599-685x1024.jpg

because removing blooms keeps plants producing more and more. Plus the orange and yellows leave me spellbound.

Noticed elsewhere:

A peek inside a beautiful Ottawa home by Suzanne

DSC_3510.jpg

I read if you blog and you're a woman you blog less in the summer because of attention pulled elsewhere: to gardens, to kids (if you have them) because they're no longer in school, and to holidays. So true in my experience.

When I think to sit down and share with you a great recipe, an interesting link or opinion, I get side tracked by life. Potted flowers need watering, lawn needs mowing, I need to be outside and take in the beauty of the season, and so on. And kids, even though they may be big (like mine are) need attention, too. (I write this while in the midst of getting ready to join Simon in Cape Cod for five days. Sans enfants!!)

Something else that occupies a good chunk of my time lately is helping to organize the Glebe House Tour. This fall's group of five homes is wonderful. Before I leave for Cape Cod, how's about I give you peek inside one them.

248-queen-elizabeth-drive-13a.jpg

It was built in the early 1900's and recently renovated, guided by the vision of its homeowners, Jenny and Alain.

I love this home. It's welcoming, comfy and elegant. I love its spaciousness even though it's not an open concept home. In fact, no walls were torn down during the renovation. However, hallways were widened and openings were created in some walls allowing for very pleasing sight lines into adjacent rooms.

And light! Maybe it's because I feel I have to wait for or seek out good light in our home that I was so taken with the abundance of beautiful light in this one. Not only light, but beautiful views to the outside as well. In fact, there are window views of Ottawa's Rideau canal from practically every room.

Add to those qualities a wonderful blend of custom-built and antique furniture plus great finds from Home Sense and Ikea, and carefully chosen fixtures and original art, and you have yourself a very beautiful home.

We're so happy to have it on this fall's Tour.

Thank you Alain, Jenny, Tom and Molly the dog!

-drivea.jpg
b.jpg
c.jpg
d.jpg
f.jpg
g.jpg
h.jpg
i.jpg
j.jpg
k.jpg
l.jpg
m.jpg
n.jpg
o.jpg
p.jpg

Easy summer eating: pasta salad, two ways by Suzanne

DSC_4236-686x10241.jpg

Common knowledge suggests people eat less when it's hot.

After a recent string of hot breezy summer days, I answered the call for lighter fare with pasta salad. I was reminded what a great dish it is for hot weather, and how well it lends itself to variations.

DSC_4218-686x10242.jpg
DSC_4221-686x10243.jpg
DSC_4290-686x1024a.jpg
pasta-saladb.jpg
IMG_6653-1c.jpg

Regardless of the type of pasta salad you choose to make, here are a few things I learned about how to make it taste great.

  • Give your salad flavour right from the get-go by boiling your pasta in heavily salted water.

  • Short pasta shapes, like rotini, are good choices for pasta salad if you don't want to eat by twirling with a fork. Their small size makes them easy to serve and eat, and their little folds and crevices provide plenty of spaces to trap dressing, herbs, and small ingredients.

  • Cook pasta until it's just past al dente. Pasta hardens and gets more chewy as it cools so it needs to be cooked just right, soft but not mushy.

  • Drain pasta and rinse under warm not cold water. Once drained, transfer to a cookie sheet or large platter and dress with oil while it's still warm.

  • Serve pasta salad at room temperature. It helps the pasta have a more appealing texture (no congealing of oils, no chewiness) and really lets the flavours loose. Make sure you don't let it sit out for more than a couple hours to avoid food-poisoning.

  • Good quality oils like extra virgin olive oil and are just the ticket. So are fresh herbs and nuts.

  • Don't dress the salad all at once. Keep some of the dressing and pour it on right before serving.

DSC_4294-1a.jpg
pastab.jpg

Soba Noodle Salad with Peanut Dressing

250 grams soba noodles

1 bunch green onions, chopped

1 cup julienned carrots (I used the ones that come in a bag already prepared)

1 cup fresh coriander, chopped

1/2 cup chopped unsalted peanuts

1 inch piece of ginger, minced

juice of 1 lime

4 tablespoons sesame oil plus more for drizzling over noodles

1 generous spoonful peanut butter

2 tablespoons tamari or soy sauce

fresh mint for garnish

Bring a large pan of salted water to the boil. Throw in the pasta, boil until just past al dente, drain and rinse under warm water. Transfer to a cookie sheet and drizzle with oil.

Chop the onions, and coriander. Add to bowl along with carrots and pasta.

Combine minced ginger, lime juice, peanut butter, sesame oil and tamari. Whisk well. Thin with warm water if needed.

Drizzle over the salad, add peanuts and toss well. Transfer to serving platter or bowl. Garnish with sprigs of fresh mint, a few extra chopped peanuts and serve.

If not serving right away, save some of the dressing and peanuts to add later, just before serving.

Tabouleh Inspired Pasta Salad with Preserved Lemon and Pine nuts

500 grams of pasta of your choice. I used gluten-free rotini made from corn

1 small container grape tomatoes, halved

1 bunch flat leaf parsley, chopped

1 handful of fresh mint, chopped

1 half of a large red onion, chopped

1 clove of garlic, minced.

1/2 preserved lemon, finely chopped along with a good splash of the brine. Or, the juice of 1 lemon

3/4 cup extra virgin olive oil

1/2 cup pine nuts

crumbled goat feta (optional)

freshly ground black pepper

Bring a large pan of salted water to the boil. Throw in the pasta, boil until just past al dente, drain and rinse under warm water. Transfer to a cookie sheet and drizzle with oil.

Chop the tomatoes, parsley, mint, and onion and add to a bowl along with pasta.

Combine minced garlic cloves, chopped preserved lemon, brine, oil and pepper. If using lemon juice, add sea salt to taste. Drizzle over the salad and toss well. Mix in pine nuts and serve.

Crumble goat feta for folks to sprinkle on top (opptional).

If not serving right away, save the pine nuts and some of the dressing to add later, just before serving.

Beauty heals by Suzanne

DSC_3185-797x1024.jpg

Our backyard garden is delivering beauty via beautiful blossoms on an almost daily basis and, lately, I'm acutely aware of its calming and grounding effect.

I feel an uncomfortable knot in my stomach and, after a short putter in the garden, a feeling of ease arrives. The tightness dissipates. I can hardly believe how well it works at soothing a dark and fretful mood. It's one thing to know it intellectually, it's quite another for the healing power of beauty, of nature, to be a real felt experience.

DSC_1854-686x10242.jpg
DSC_1800-686x10243.jpg
DSC_1344-686x10244.jpg
DSC_3295-686x10241.jpg

As I write this, the peonies are fading fast. Those in vases are dropping their petals at a startling rate, and those left on the bush are exploding into beautiful messes.

DSC_3299-686x1024a.jpg

The pink rose bush is up next and from the looks of things there will be plenty of blooms. Soon after, the day lilies start producing their cheery orange trumpets.

DSC_1300-686x10241.jpg
DSC_2696-686x10242.jpg
DSC_2744-686x10243.jpg

And the marigolds, I can hardly wait to greet the marigolds. I started them from seeds gathered from last years flowers. I was a little late starting them so I have a bit of a wait. But when they do finally flower, unlike the peonies, they tend to stick around longer.

Bathroom revamp reveal by Suzanne

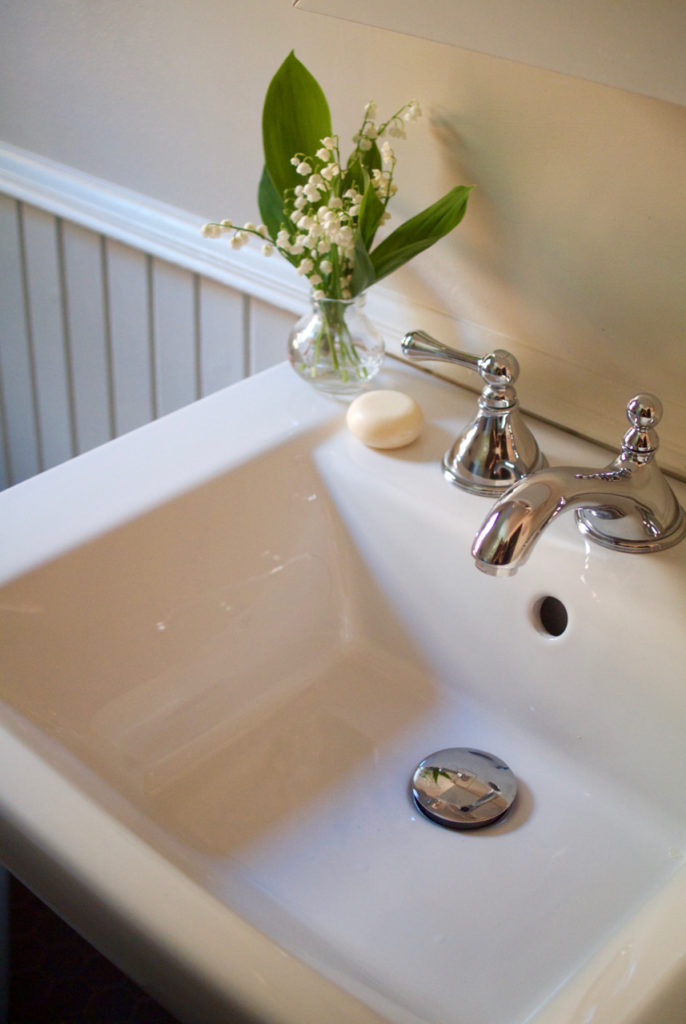
Our new bathroom is just like the old bathroom, only better. The old fixtures were removed and replaced. We now have a beautiful and deep soaker tub to better accommodate the tall folks in our home, a new sink (not at all unlike its predecessor in its pedestal design) and a new high tech toilet with hands-free functions to keep the toilet cleaner for longer. The less often hands touch things the cleaner things remain. The toilet was Simon's choice and, although it took getting used to, I think I'm beginning to like it. Especially that it seems to stay cleaner longer.

Faucets and towel holders were also upgraded.

IMG_6302b.jpg
IMG_6303a.jpg
DSC_2615-686x1024d.jpg
DSC_2350-686x1024e.jpg
f.jpg
DSC_2337-686x1024g.jpg

You can program the toilet so the seat opens when you enter the room, flushes itself once you're finished and closes a few minutes later.

Everything is in the same place as before (except for a light switch) and the footprint hasn't moved a smidgen. Yet the bathroom feels bigger because we installed a pocket door.

IMG_6300a.jpg
DSC_2354-686x1024b.jpg

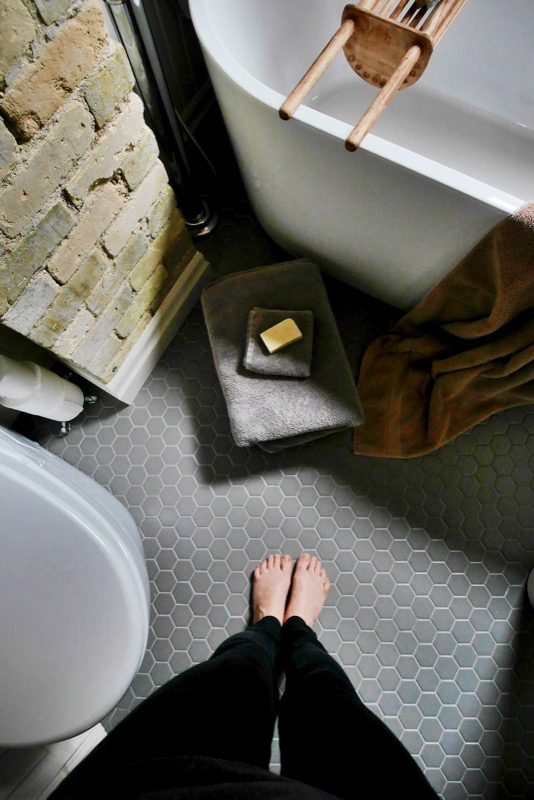
The floor is also new. I love the look of hexagon tiles and how good they feel on bare feet.

IMG_6350-1.jpg

We kept the wainscoting and only removed it from around the chimney to expose more of the brick.

DSC_2556-686x1024.jpg

Ceiling, walls, trim and wainscoting are painted the same colour, "parchment" by C2.

DSC_2600-686x1024a.jpg
IMG_6296b.jpg

Almond meal cookies with coconut and cacao nibs by Suzanne

DSC_1683-686x10241.jpg

I'll be sharing before and after shots of our recent bathroom revamp very soon.

The bathroom is up and running with only a final few details to complete before ready for its closeup. I'm still getting used to the new toilet. It does just about everything except speak to you. I'm not kidding.

In the meantime, let me share with you a very good cookie recipe. I've made this several times and it's never failed. Readers looking for a gluten-free cookie will be particularly interested in this recipe.

If you don't have cacao nibs, feel free to use chocolate chips instead. Although the cacao nibs offer a little more intensity and are less sweet.

Either way, this recipe is easy and straightforward, and results in a satisfying cookie that's sweet and chewy with lots of flavour. Your house will smell wonderful while they bake, too.

I double the recipe and keep half the dough stored in an airtight container in the fridge, to bake on another day.

They store well too.

DSC_1698-686x10242.jpg
DSC_1719-686x10243.jpg

Almond Meal Cookies with Coconut and Cacao Nibs (from the Sprouted Kitchen cookbook by Sara Forte)

Makes: 18-20 small cookies

1 1/4 cups almond meal

1/4 cups cacao nibs

1/2 cup unsweetened shredded coconut

1/2 teaspoon baking powder

1/2 teaspoon kosher salt

1/3 cup sugar (I used coconut sugar)

1 egg

3 tablespoons coconut oil, melted

1/2 teaspoon pure vanilla extract

Preheat the oven to 350 F.

In a large mixing bowl, stir together the almond meal, cacao nibs, coconut, baking powder, salt and sugar.

In another bowl, beat the egg very well until it's a uniform color and doubles in volume. Whisk in the coconut oil and vanilla extract.

Add the wet ingredients to the dry ingredients and mix until just combined.

Refrigerate bowl for at least 30 minutes and up to overnight. Roll the chilled dough into 1 inch balls using your hands. Place on baking sheet with 1 1/2-inches space between them, and slightly flatten with a gentle press with the palm of your hand or with a fork. Dipping the fork into a glass of cold water after each press helps to prevent sticking.

Bake until edges just begin to brown, about 7-10 minutes. Remove from the oven and allow to cool before serving.

DSC_1681-686x10241.jpg
DSC_1671-686x1024.jpg

Make your own preserved lemons by Suzanne

make your own preserved lemons

I love the taste of preserved lemons - a bold lemony essence that’s more mellow and less tart.

This zesty condiment is a specialty in North African, South Asian, and Mediterranean cuisine. If you’re lucky, you can find preserved lemons in Middle Eastern or specialty stores near you or you can make your own.

As preserving projects go, this one’s easy. Some squeezing, scrubbing, trimming, slicing, and packing with salt, and placing in jars before you leave them to sit where you can keep an eye on them.

make your own preserved lemons

Although they only take 20 minutes to prepare, preserved lemons require a month’s rest (certainly no less than two weeks) before they’re ready to eat. After that, they practically last forever.

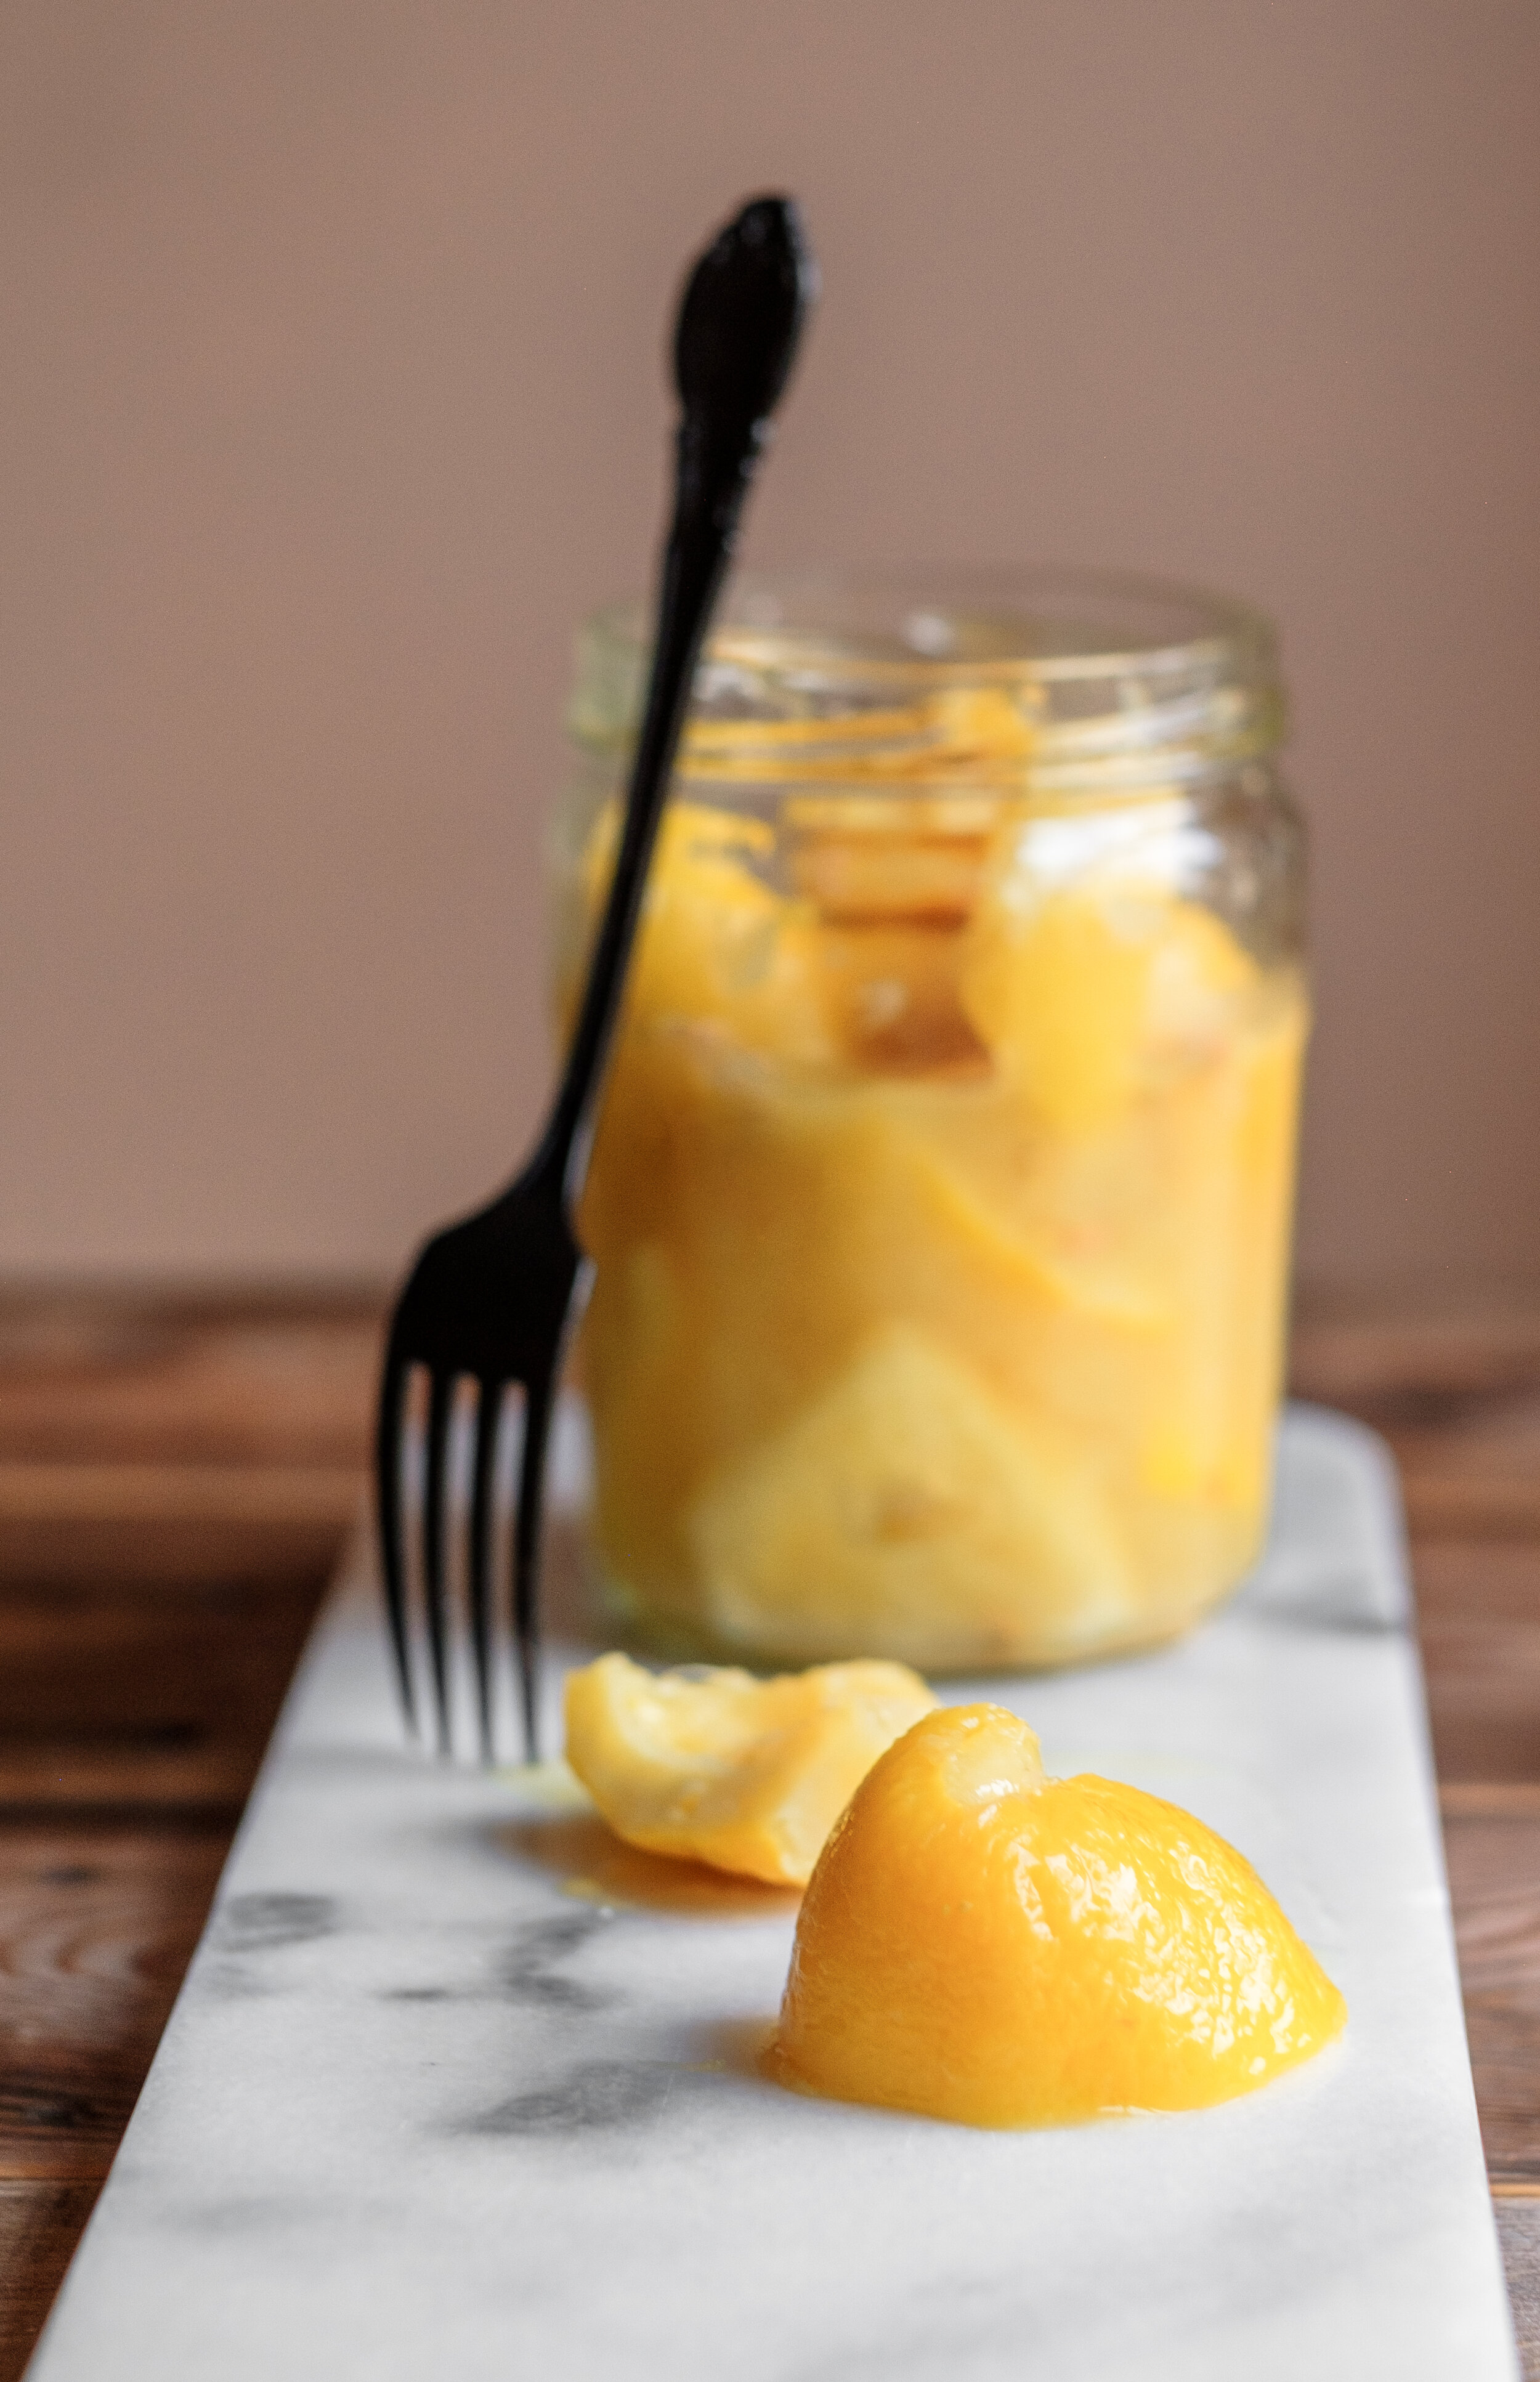
A jar or two sitting on the kitchen counter is like watching sea monkeys grow; you note their progress and track them as they soften and slowly nestle down inside the glass jar, and change from bright yellow into glowing golden orbs that light up the room.

Preserved lemons help elevate all kinds of dishes. I’ve listed some at the bottom of this post. They also make a good gift for the enthusiastic cook or foodie friend.

Visual learners will appreciate this brief and excellent how-to video.

make your own preserved lemons

Preserved lemons

Make one jar or many, depending on quantity and size of jars and lemons.

You will need:

Glass jars

Salt (sea salt or kosher)

Lemons (some to preserve and some for juice)

Spices are optional: add fennel, caraway seeds or peppercorns, cinnamon sticks, bruised cardamom pods, bay or kaffir lime leaves or crushed dried chilies.

Use well washed jars. If you want to sterilize your jars (I don’t) wash in hot soapy water, rinse and place in a preheated oven at 250 F for 20 minutes. Sterilize lids in boiling water for 5 minutes.

Thoroughly scrub lemons.

Trim the nubs off both ends of each lemon.

Quarter the lemons but not all the way through; cut from the top to within 1/2 inch of the bottom. You may need to cut all the way through, into four complete quarters, if using small jars.

Place enough salt to cover the bottom of the jar.

Salt inside the opening of each lemon and reshape.

Pack in the lemons and push them down, adding more salt and the optional spices between layers.

If using quarter pieces place them in the jar and layer with salt.

Press the lemons down to release their juices and to make room for more lemons.

Fill the jar with freshly squeezed lemon juice. Make sure the lemons are well submerged. Push them down further into the jar and add some more juice if necessary.

Seal the jar and let sit on counter.

Check on the lemons for the next few days. Upend them from time to time and give them a shake to redistribute the loose salt.

When they're ready, pluck one from the jar and rinse it under cool running water to remove excess salt. If you skip this step hold back on adding any salt to the recipe.

Use the whole lemon (seeds removed) or discard the pith and pulp and add the rind only.

Once opened store in the refrigerator.

make your own preserved lemons

How to use your preserved lemons:

Chop the rind and add to guacamole and hummus (my favourite!), to yogurt with a bit of honey or to olives in a tapenade.

Mash with butter and fresh herbs and smear on top of grilled fish or roasted vegetables.

Finely dice and mix with green beans, peas or carrots.

Add thin strips to braising liquid during the last few minutes of cooking.

Whizz them into your salad dressing.

Make ice cream.

Use the lemony brine in a cocktail.

This and that by Suzanne

Here are five things that caught my attention this past week:

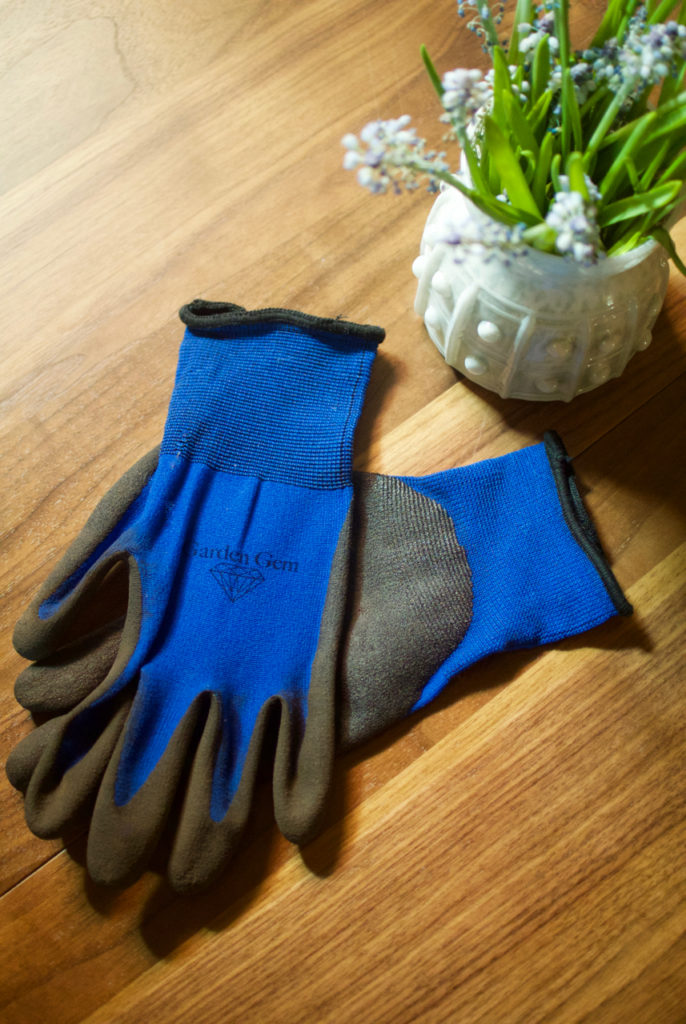
1. these gardening gloves

DSC_1244-686x1024.jpg

because I plan on taking better care of my hands this summer. Take that, age spots!

2. these branches

DSC_1268-686x1024.jpg

because they brighten this dark room and my spirits considerably.

3. this boy and cat

DSC_1259-686x1024.jpg

because he was unbelievably brave despite having the muscles in both of his eyes cut and moved, and this cat because he is an elixir for speedy healing.

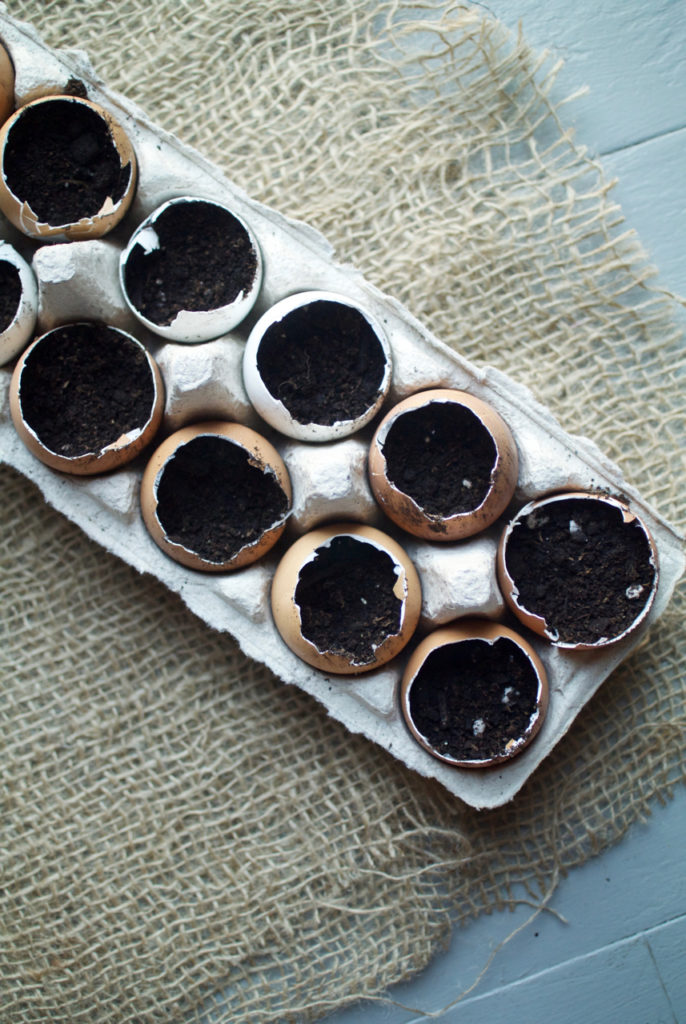
4. these eggshells

DSC_1292-686x1024.jpg

because they make perfect seed starting vessels.

5. these marigold seeds

DSC_1300-686x1024.jpg

because I collected and saved them last fall, and now it's time to bring them to life.

Noticed elsewhere:

even the guys on stage don't know where Prince's guitar went

can an animal understand magic? yes!

miscommunication with emojis

this new comedy series

going to see this Wednesday

edible flower recipes

Oven-roasted radishes by Suzanne

DSC_0837-686x1024.jpg

Maybe for you radishes are a raw-only vegetable.  I recently discovered how delicious they are roasted. Brief high roasting mellows their vibrant colour, tames their peppery bite and gives them a soft fuller flavour.

The green tops are edible, too, and highly nutritious. My green tops were looking a little sad so I skipped roasting them, but you can rinse and roast them on the same baking sheet. They amp up the colour and flavour.

Roast radishes alone or with a medley of other vegetables. Carrots would be good. Or use them as a salad topping. Or eat them right off the tray for an after school snack.

DSC_0843-686x10241.jpg
oven-roasted radishes
DSC_0694-686x10243.jpg

Oven-roasted radishes

This is a basic recipe. Feel free to personalize with your preferred herbs and oil. Browned butter would be good or maybe some lemon zest. Adding a little honey might be interesting.

2 bunches radishes, fresh (not the ones in a sealed plastic bag)

2 tablespoons olive oil

salt, to taste

black pepper, to taste

chopped fresh flat leaf parsley

flaky sea salt, to finish

Heat oven to 425 degrees.

Line a large baking sheet with parchment.

Rinse radishes.

Slice in half from stem to root. I leave a little of the stem and root on mine because I like how it looks but feel free to trim.

Drizzle with olive oil and season with salt and pepper. Toss to combine. I like to turn mine cut side down on the tray. I like how they caramelize that way.

Bake until radishes are tender and caramelized, about 15 to 20 minutes.

Sprinkle with chopped fresh parsley (or herb of your choice).

Season with flaky sea salt

DSC_0828-686x10241.jpg

This and that by Suzanne

One of my favourite bloggers runs this series on her blog called "my week in objects." I love it so much I thought I'd run a similar series on mine. Here are things that have captured my attention lately:

1. these biodegradable and compostable straws

DSC_0577-686x1024.jpg

because they've upped our smoothie game big time.

2. this street sign

DSC_0522-686x1024.jpg

because there will be less dust and debris and now we can safely wash our windows.

3. this garden succulent

DSC_0521-686x1024.jpg

because the snow has melted and the garden is waking up.

4. these eggshells

DSC_0550-686x1024.jpg

because I've been collecting them to pulverize and spread about in the garden.

5. these tiny spring bulbs

DSC_0543.jpg

because they make my heart glad and I scored them at the local grocery store. Three small pots for only $2.99 each.

Other things that have caught my attention elsewhere:

the rich social environment of dogs without collars

looking forward to seeing this in June

this paint colour

this watercolour and ink

been loving this artist for a few years. her latest here and here.

this kitchen

Roasted carrots with pine nuts, spinach and raisins by Suzanne

DSC_0148-686x10243.jpg

Wondering where we're at with our bathroom renovation? Well, the tub is finally out of the living room and installed in the bathroom.

It's a five-foot long deep soaker tub. Since water weighs a lot (one kilogram per litre) our contractor wanted to be certain we wouldn't come crashing down through the floor and into the kitchen on our first dip into the bathtub.

Rather than fill the tub with water (and risk having THAT mess to deal with should the floor not be able to withstand the weight) he chose a static weight; he placed in the tub several sand bags totalling hundreds of pounds and then jumped in to add to the load. Turns out this old house's structure is sound enough and we can bathe without anxiety.

DSC_0204-686x1024.jpg

Speaking of certainty, I was roasting carrots the other night, certain I had prepared enough for my hungry crowd. But when I pulled them from the oven they had considerably shrunk and the amount seemed scant.

DSC_0098-686x1024.jpg
DSC_8728-686x1024B.jpg
DSC_8773-686x1024D.jpg

My wise daughter suggested I add spinach to bulk things up. So I added several handfuls of tender spinach to the hot cookie sheet, tossed it among the carrots (which helped it slightly wilt), added salt and pepper, a squeeze of lemon juice and voila!

Coincidently, I recently came upon this recipe, which inspired me to add spices, pine nuts and raisins. The result is a flavourful and hearty dish, packed with nutrients. It's colourful and pretty, too.

DSC_0127-686x1024a.jpg
DSC_0155-686x1024b.jpg

These are the amounts I used to feed five hungry people as a side dish.

Roasted carrots with pine nuts, spinach and raisins

14 medium carrots, scrubbed and cut into 1-inch pieces

4 tablespoons olive oil

2 teaspoons spice of your choice (I used freshly grated nutmeg)

3/4 cup raisins (or dried cranberries or cherries)

1/2 cup pine nuts (or pumpkin seeds)

juice of 1/2 a lemon

Several handfuls of tender spinach (or mesclun greens)

Salt and pepper to taste

Preheat oven to 425 degrees F.

Line a rimmed baking sheet with parchment paper.

In a large bowl, toss carrots with olive oil and spice of your choice. Spread out on prepared baking sheet and roast 20 minutes or until carrots are tender with golden brown edges.

Remove from oven. Scatter raisins and pine nuts on hot baking sheet and gently toss.

Add spinach to carrots and toss gently.

Finish with a squeeze of lemon, a pinch of sea salt and pepper to taste.

Serve directly from baking sheet.

Pineapple upside down skillet cake, gluten and dairy free by Suzanne

a.jpg
DSC_0024-686x1024.jpg

More than one thing was upside down in our house last week.

That upside down bathtub, will very soon be upstairs in its rightful place after taking up space in the middle of our living room floor for more than two weeks.Our bathroom renovation is on-going but the end is in clear sight.

These things always take longer than you want but I've been surprisingly patient about the inconvenience, even in the midst of hosting my father in-law for a 10-day visit. Six people, sharing one bathroom, for 10 days and we are still courteous and friendly with each other; a testament to our collective good nature and strong sense of knowing it's a privilege to complain about such things.

The other object upside down in our house recently is this cake, perhaps the 20th century's most notorious retro-chic dessert creation, the Pineapple Upside-Down Cake.

DSC_9923-686x1024a.jpg

The name refers to the way the cake is served - flipped out of the pan so the bottom becomes the top, revealing a moist topping, commonly consisting of fruit, caramelized in a melted sugary-butter blend.

The technique of cooking a cake upside down has been around since the Middle Ages when cakes were cooked in cast iron skillets on top of the stove.

Today, we bake them in ovens and use almost any kind of cake pan. I baked mine in my trusted old blackened cast iron skillet.

I've always liked this dessert but I find it cloyingly sweet. Since my youngest requested it for his birthday I felt determined to come up with a version for the gluten sensitive folks in our home but also for my lack of an overly sweet tooth.

Three tries later and mission accomplished. I used fresh instead of canned pineapple (although i like canned too), pitted sour cherries (not as pretty or as retro as maraschino cherries but still taste great), coconut oil instead of butter, honey instead of sugar, and almond flour in lieu of wheat flour.

DSC_9687-686x1024a.jpg
DSC_9848-686x1024b.jpg

The presentation can be quite striking, especially if you take care to arrange the fruit nicely before spooning on the batter, which you do very carefully so as to not disturb the placement of the fruit.

DSC_9865-686x1024a.jpg
DSC_9821-686x1024c.jpg

Pineapple Upside Down Skillet Cake

2 cups almond flour

1 tsp baking powder

1/2 tsp salt

4 eggs, separated. Beating the egg whites and then folding into the batter results in a lighter cake.

10 tbsp honey

6 tbsp melted coconut oil or oil of your choice. Olive oil works well, too.

2 tsp vanilla extract

at least 3 slices of fresh pineapple, 1/2 inch thick

pitted cherries for decorating (I used sour cherries in a light syrup but you could use fresh or frozen too)

Preheat oven to 325 F

Lightly grease a 10 inch cast iron skillet. I sprayed mine with coconut oil.

Place 3 tablespoons of the honey in the skillet. Slightly warm over low heat so the honey gets runny and spreads evenly. Remove from heat and arrange the pineapple slices and cherries in a decorative pattern in the pan. Place the skillet in the oven and cook for 20 minutes.

Mix almond flour, baking powder and salt.

In a medium bowl cream the eggs yolks with the remaining honey. Add the coconut oil and vanilla, and mix to combine. Add the almond mixture and combine well. Beat the egg whites and fold into batter.

Remove skillet from oven and carefully pour batter over the top of the fruit and smooth it out so as to not disturb the pattern. Return to oven and bake for 25 minutes. Touch the top of the cake lightly with a fingertip. If it springs back then it's done. If not, allow to bake for a few more minutes.

Remove from the oven and let stand for 10 minutes, then carefully turn out onto a plate. Serve warm with whipped cream and more cherries.

Store any remaining slices in an airtight container in the fridge.

DSC_9945-686x1024a.jpg

Three seed brittle with coconut by Suzanne

DSC_9110-686x1024a.jpg

I want to tell you about my latest favourite snack, three seed brittle with coconut.

It's different from the sticky buttery sweet peanut brittle we had when I was a kid. Yet it has the same saltiness and sweetness. It also delivers a satisfying crunch without threatening to crack a tooth or mess too much with your blood sugar levels.

It's easy to make in less than 40 minutes, start to finish. No need for the constant attention required for traditional stove top brittle.

My first batch turned out great, although I kept a close eye on it to make sure it didn't over cook and burn on the edges.

For the second batch I omitted the dried fruit that was listed in the original recipe. I find dried fruit gets a little too tough after it's been baked. For those of you who want to give the dried fruit a go, add a 1/2 cup dried cranberries, cherries or raisins to the mixture.

Break it in large pieces for hiking or for travel. You could also serve several on a platter with a soft goat cheese and other crudités.

When broken in smaller pieces, it's perfect for sprinkling over salad or a bowl of fruit and yogurt.

Pieces of brittle, smartly packaged, would also make an excellent hostess gift.

DSC_9038-686x1024d.jpg
DSC_9073-686x1024e.jpg

Three seed brittle with coconut adapted from Sara Britton's book My New Roots

1 cup sunflower seeds

1/4 cup pumpkin seeds

1/2 cup unsweetened shredded coconut

1/4 cup sesame seeds

1 tsp. sea salt

1 tsp. ground cinnamon

2 Tbsp. coconut oil

scant 1/2 cup brown rice syrup, coconut nectar or maple syrup

Preheat the oven to 325 degrees.

Line a rimmed baking sheet with parchment paper.

Combine the sunflower seeds, coconut, sesame seeds, salt and cinnamon in a large mixing bowl and stir well.

In a small saucepan, melt the coconut oil over low heat. Add the syrup and whisk until uniform. Pour the liquid over the dry ingredients and fold quickly to incorporate it before the mixture becomes too sticky.

Spoon the mixture onto the prepared baking sheet and smooth out the top with the back of an oil-greased spatula.

Bake for 15-20 minutes until golden brown. Let cool completely on the baking sheet.

Crack the brittle into pieces and store them in a sealed container at room temperature for up to two weeks.

DSC_9127-686x1024.jpg